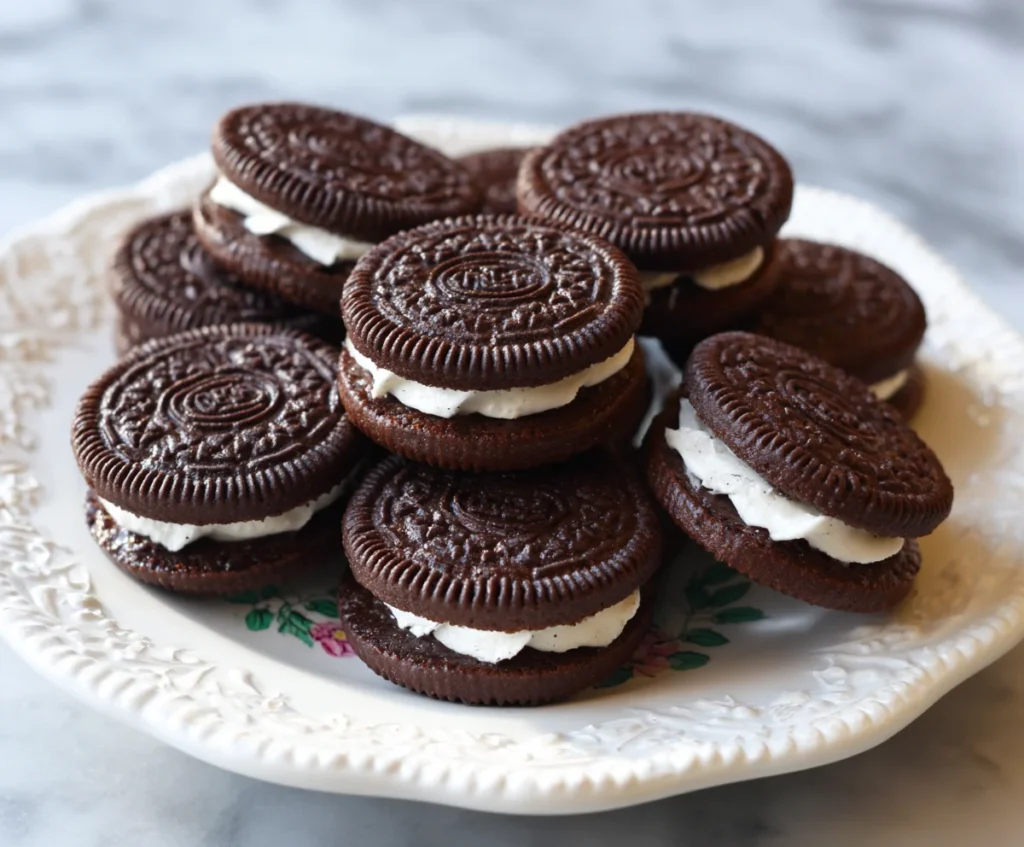
Homemade Oreo Cookies Recipe
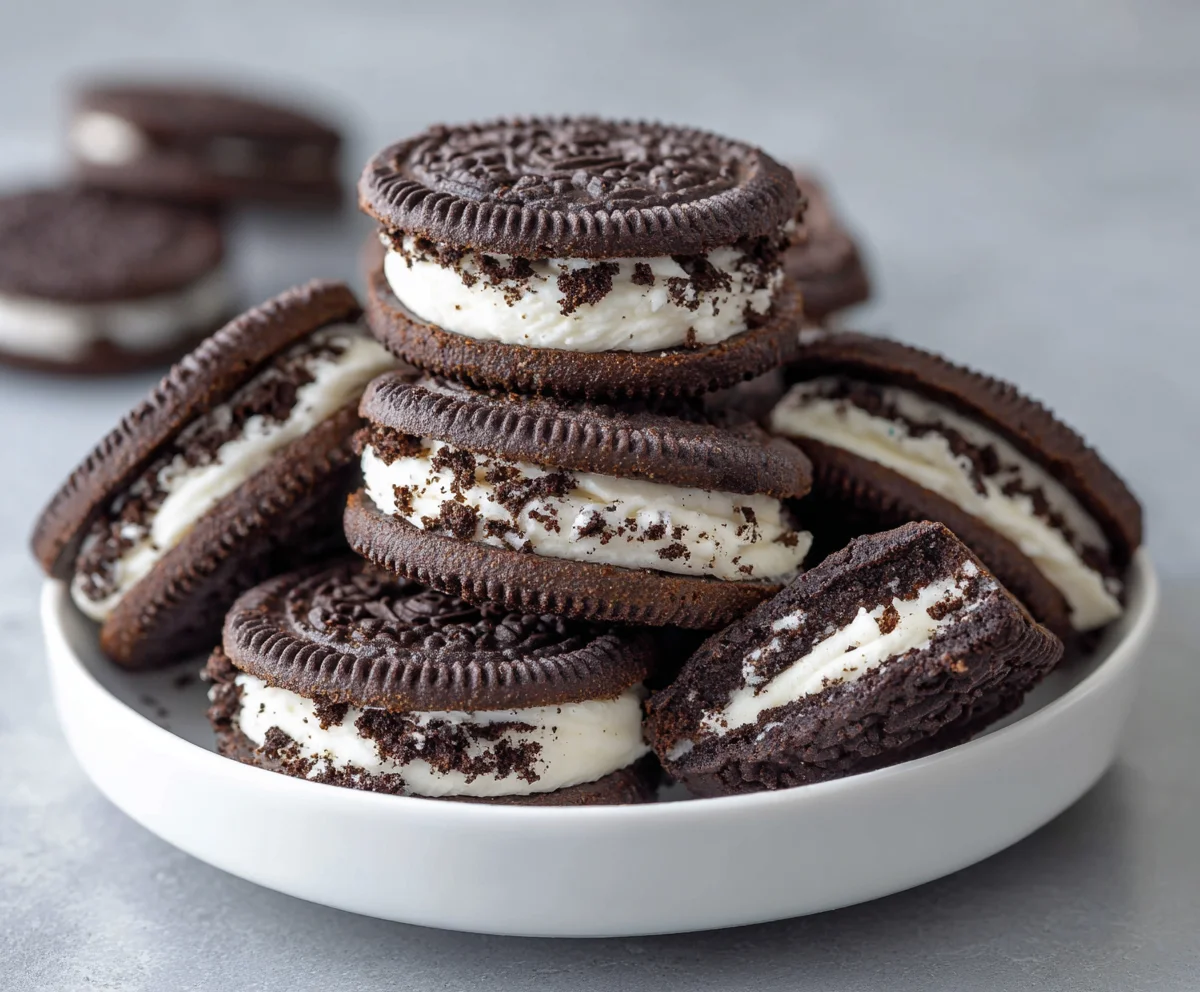
Few cookies embody nostalgia and precision like Oreos. Making them at home elevates the experience: you control the ingredients, the texture, and the flavor balance. These homemade Oreo cookies deliver crisp, chocolatey shells with a perfectly creamy filling, capturing the classic taste while feeling fresh, indulgent, and artisanal. With careful technique, you’ll achieve bakery-level quality without any shortcuts.
Ingredients List
- 1 ¼ cups (155 g) all-purpose flour
- ¾ cup (75 g) unsweetened cocoa powder
- 1 teaspoon baking soda
- ½ teaspoon baking powder
- ¼ teaspoon fine sea salt
- 1 cup (200 g) granulated sugar
- ½ cup (115 g) unsalted butter, softened
- 1 large egg
- 1 teaspoon pure vanilla extract
- 2 teaspoons milk
- ¾ cup (170 g) unsalted butter, softened (for filling)
- 1 ½ cups (180 g) powdered sugar (for filling)
- 1 teaspoon pure vanilla extract (for filling)
- 1–2 tablespoons heavy cream (for filling, optional)
Step-by-Step Instructions
Step 1: Prepare the Dry Ingredients
In a medium bowl, sift together flour, cocoa powder, baking soda, baking powder, and salt. This ensures even distribution and prevents clumps in the cookie dough.
Step 2: Cream Butter and Sugar
In a large bowl, beat the softened butter with granulated sugar until pale and fluffy, about 3–4 minutes. Proper aeration is key for light, crisp cookies.
Step 3: Incorporate Egg and Vanilla
Add the egg and vanilla extract to the creamed butter mixture, mixing until fully incorporated. Scrape the bowl to ensure even blending.
Step 4: Combine Wet and Dry Ingredients
Gradually fold the dry ingredients into the wet mixture using a spatula. Add 2 teaspoons of milk to help the dough come together. Do not overmix; the dough should be firm but pliable.
Step 5: Chill the Dough
Wrap the dough in plastic wrap and refrigerate for 30–45 minutes. Chilling prevents spreading during baking and enhances flavor development.
Step 6: Shape the Cookies
Roll the dough into small balls (about 1-inch diameter). Flatten slightly and place on a parchment-lined baking sheet, leaving 2 inches between cookies. For uniformity, use a cookie scoop or small ice cream scoop.
Step 7: Bake the Cookies
Preheat oven to 175°C (350°F). Bake cookies for 10–12 minutes, until edges are set but centers remain slightly soft. Allow to cool on the pan for 5 minutes before transferring to a wire rack to cool completely.
Step 8: Prepare the Filling
Beat softened butter until creamy. Gradually add powdered sugar and vanilla extract, mixing until smooth. Add 1–2 tablespoons of heavy cream if needed for a soft, pipeable consistency.
Step 9: Assemble the Cookies
Pipe or spread a generous amount of filling onto the flat side of one cookie and sandwich with another. Press gently to secure.
Step 10: Optional Decoration
Dust lightly with powdered sugar or drizzle melted chocolate for a refined finish.
Cook Time
- Prep Time: 20 minutes
- Chill Time: 30–45 minutes
- Bake Time: 10–12 minutes per batch
- Total Time: Approximately 1 hour 15 minutes
Servings
Makes 20–24 sandwich cookies, depending on size.
Nutritional Information (approx. per serving)
- Calories: ~180 kcal per cookie
- Fat: 10 g
- Carbohydrates: 22 g
- Sugar: 14 g
- Protein: 2 g
- Sodium: 80 mg
Storage Instructions
Store in an airtight container at room temperature for up to 5 days.
For longer storage, freeze assembled or unassembled cookies for up to 2 months. Thaw at room temperature before serving.
Suggestions
- Pair with a glass of cold milk or a hot espresso for contrast.
- Add a hint of espresso powder to the chocolate dough for a mocha twist.
- For variety, flavor the filling with mint extract, orange zest, or peanut butter.
- Use a piping bag for perfectly even filling layers.
Seasonal Relevance
These cookies are timeless, perfect for holiday gifting, birthday celebrations, or cozy winter treats. They also work beautifully for summer gatherings, especially when paired with ice cream for a sandwich variation.
Conclusion
Homemade Oreo Cookies are a masterclass in balancing flavor, texture, and nostalgia. By paying attention to chilling, aeration, and proper filling consistency, you can create cookies that rival store-bought favorites while offering the satisfaction of artisanal craftsmanship. Crisp chocolate shells, creamy filling, and the joy of homemade baking combine to deliver a cookie everyone will adore.

Homemade Oreo Cookies Recipe
24
servings20
minutes12
minutes180
kcal32
minutesCrispy, chocolatey cookies with a smooth, creamy filling—these Homemade Oreo Cookies bring bakery-quality indulgence to your kitchen. Perfect for snacking, gifting, or pairing with milk or coffee.
Ingredients
For the cookies:
1 ¼ cups (155 g) all-purpose flour
¾ cup (75 g) unsweetened cocoa powder
1 teaspoon baking soda
½ teaspoon baking powder
¼ teaspoon fine sea salt
1 cup (200 g) granulated sugar
½ cup (115 g) unsalted butter, softened
1 large egg
1 teaspoon pure vanilla extract
2 teaspoons milk
For the filling:
¾ cup (170 g) unsalted butter, softened
1 ½ cups (180 g) powdered sugar
1 teaspoon pure vanilla extract
1–2 tablespoons heavy cream (optional)
Directions
- Preheat oven to 175°C (350°F). Line baking sheets with parchment paper.
- In a medium bowl, sift together flour, cocoa powder, baking soda, baking powder, and salt.
- In a large bowl, beat butter and sugar until pale and fluffy.
- Add egg and vanilla extract; mix until combined.
- Gradually fold in dry ingredients and milk until a firm, pliable dough forms.
- Chill dough for 30–45 minutes.
- Roll dough into 1-inch balls, flatten slightly, and place on baking sheets 2 inches apart.
- Bake for 10–12 minutes, until edges are set. Cool on pan 5 minutes, then transfer to wire rack.
- Beat butter for filling until creamy. Gradually add powdered sugar, vanilla, and cream (if using).
- Pipe or spread filling onto one cookie and sandwich with another.
Recipe Video
Notes
- Chill dough to prevent cookies from spreading.
- Use jimmies-style cocoa for smooth texture and deep color.
- Store at room temperature up to 5 days or freeze for up to 2 months.
- Experiment with flavored fillings like mint, orange, or peanut butter.
FAQs
1. Can I use dark cocoa powder instead of regular cocoa?
Yes. Dutch-processed or natural cocoa both work, though Dutch-processed gives a deeper, less acidic flavor. Adjust sugar slightly if needed.
2. Can these cookies be made gluten-free?
Yes. Substitute with a 1:1 gluten-free flour blend and ensure it contains xanthan gum for structure.
3. How do I prevent the filling from being too runny?
Ensure butter is softened, not melted. Gradually add powdered sugar and heavy cream, adjusting consistency slowly until it holds its shape.